
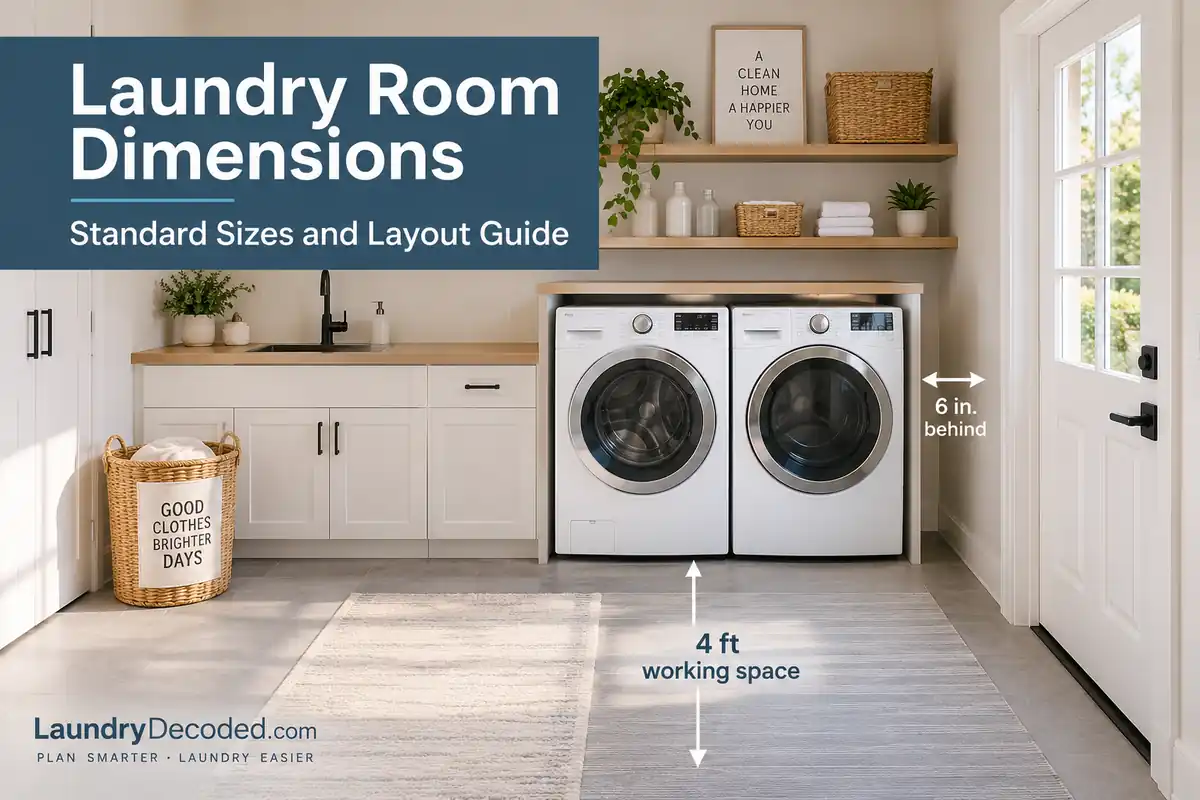
Laundry room dimensions are not based on one universal standard. A useful planning reference for a basic dedicated room is about 5 x 8 feet, but the right size depends on the washer and dryer configuration, installed appliance depth, door or lid movement, hookups, storage, and the open floor area needed to load and unload laundry.
Whirlpool describes a room around 40 square feet, or 5 x 8 feet, as a practical medium-size example that can usually accommodate a side-by-side pair plus some folding space. Treat that as a starting point rather than a required minimum. A room with the same square footage can work very differently depending on which wall holds the appliances and how much clear floor space remains in front of them.
| Room layout | Main space driver | What to measure before finalizing |
|---|---|---|
| Side-by-side laundry room | Wide appliance wall plus usable depth in front | Total installed pair width, rear connections, open appliance doors and front working space |
| Stacked laundry room | Less appliance-wall width but more vertical space | Stacked height, approved configuration, control reach, rear connections and front working space |
| Pass-through laundry room | Circulation path through the room | Appliance doors, room-door swing, basket space and the clear walking route |
| Laundry room with sink or counter | Fixtures compete with the appliance and working zones | Sink or counter footprint, cabinet depth, appliance access and remaining circulation space |
Important: The dimensions above are planning ranges, not guaranteed installation requirements. Always verify the specification sheet and installation instructions for the exact appliances before framing walls, ordering cabinets, or finalizing a remodel.
Is There a Standard Laundry Room Size?
There is no single room dimension that fits every home or appliance set. Published planning guidance varies because a laundry room can be a simple appliance room, a pass-through space, a mudroom, or a larger utility room with a sink, cabinets and a folding counter.
For general planning, Whirlpool currently describes a room around 5 x 8 feet, or about 40 square feet, as a medium laundry room that can usually accommodate a side-by-side pair plus a folding area. That is a useful reference, but it should not be turned into a universal minimum.
The shape matters as much as the square footage. A 5 x 8 room gives you a 60-inch wall and a 96-inch room depth. That can suit many full-size side-by-side pairs when the exact appliances and clearances fit. A differently shaped 40-square-foot room may have plenty of area on paper but lack a long enough appliance wall or enough depth in front of the machines.
This is why useful laundry room dimensions should be planned from the appliances outward rather than chosen only from a square-foot target.
The Space Zones That Actually Determine Room Size
A functional room needs more than a rectangle large enough to hold two appliance cabinets. Break the space into separate zones before deciding on the final wall dimensions.
- Appliance zone: the physical washer and dryer footprint, including a stacked or integrated configuration when used.
- Installation zone: the model-specific space needed for hoses, drain connections, power, gas connections when applicable, dryer venting and required clearances.
- Operating zone: room for a front door or top-load lid to open without hitting a wall, cabinet, room door or another appliance.
- Working zone: open floor area for standing, bending, transferring clothes and placing a laundry basket.
- Storage and fixture zone: any sink, cabinet, counter, hanging area or shelving that shares the room.
- Circulation zone: the clear path through the room, especially when the laundry room is also a passage to a garage, mudroom or another part of the home.
If you need the appliance dimensions themselves before planning these zones, start with our washer and dryer dimensions guide. This guide focuses on the room around the appliances rather than repeating individual washer and dryer sizes.
Side-by-Side Laundry Room Dimensions
A full-size side-by-side pair uses a wide appliance wall. Whirlpool’s current planning guide places many front-load pairs at about 54 inches total appliance width and many top-load pairs near 55 inches total before installation spacing is considered.
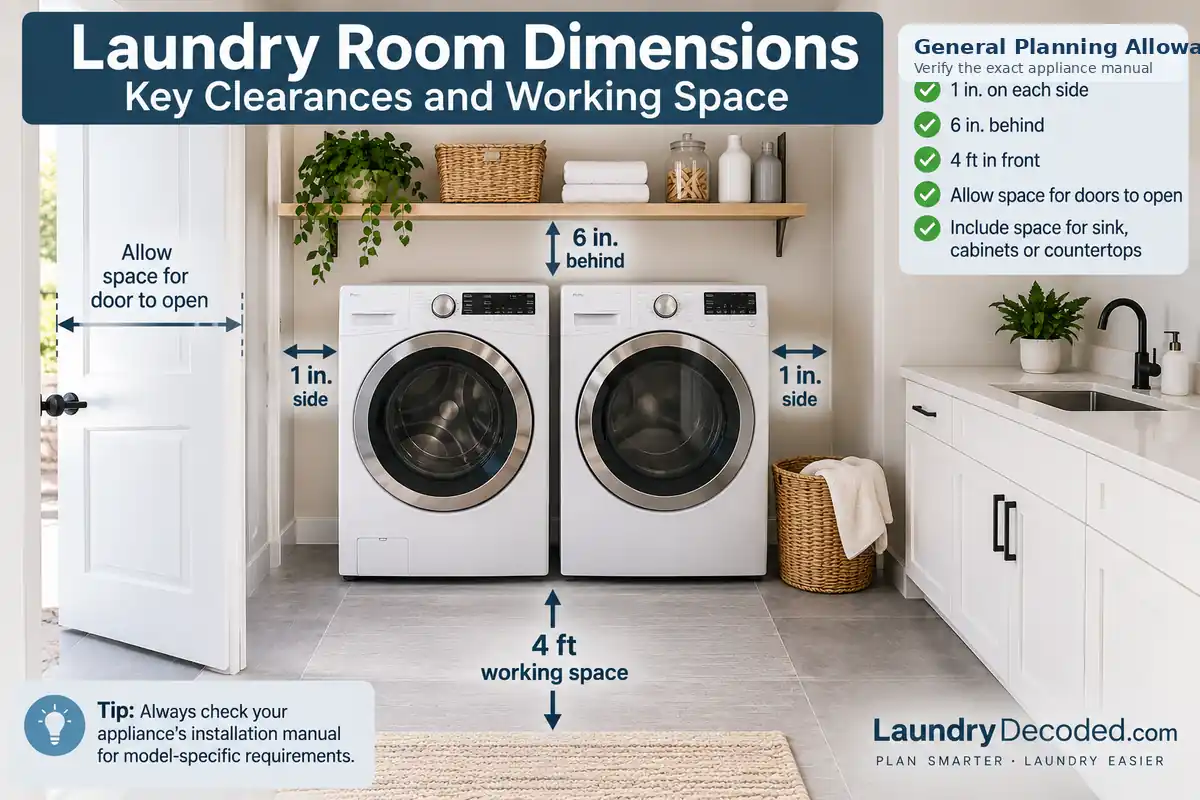
Maytag’s general washer and dryer sizing guidance recommends allowing about 1 inch between side-by-side appliances and about 1 inch at each outer side as a planning allowance. Use the exact widths and spacing requirements for the models you plan to install rather than assuming every full-size pair needs the same opening.
Our side-by-side washer and dryer dimensions guide covers appliance-width calculations in more detail. For room planning, the key point is what happens after the pair fits: you still need installed depth, door movement and usable floor space in front.
Why a 5 x 8 foot room can work as a planning example
A 5-foot wall provides 60 inches of width. An 8-foot room dimension provides 96 inches from one wall to the opposite wall. For many full-size pairs, that can create a workable one-wall layout when the appliances occupy roughly 30 to 34 inches of cabinet depth and the remaining room depth is reserved for connections and the front working area.
This does not mean every 5 x 8 room will work. A room door that swings into the appliance zone, a deep dryer, a utility sink, floor-standing storage or an awkward vent route can change the layout quickly.
Stacked and Tower Layouts Use Width Differently
Stacking moves the dryer above a compatible front-load washer, which can reduce the appliance wall width from roughly two machine widths to about one. Whirlpool’s current sizing guidance places many full-size stacked pairs around 27 inches wide, 76 to 78 inches high and 30 to 34 inches deep.
The saved wall width can be used for a tall cabinet, laundry sink, hamper zone or other storage, but stacking does not reduce the need for usable space in front of the machines. It also introduces height, control reach, approved stacking hardware and overhead-clearance questions.
For exact two-piece stacked dimensions, use our stackable washer and dryer dimensions guide. If you are considering a single integrated appliance instead, the laundry tower dimensions guide covers that different product category.
A stacked layout is therefore not automatically a “small room” layout. It is a floor-space strategy. In a normal dedicated laundry room, the main benefit may be freeing one side of the room for storage or a sink rather than making the entire room as small as possible.
How Deep Should a Laundry Room Be?
Room depth is often more important than people expect. The cabinet depth on a product page is only the first part of the calculation. The installed appliance may project farther because of connections, and the front of the room must still allow the appliance door to open and the user to work.
Maytag’s current sizing guide uses roughly 4 feet of space in front of a washer and dryer as general planning guidance for loading and unloading, along with about 6 inches behind the pair for hoses and ventilation. These are planning allowances, not requirements for every model. The exact installation instructions still control the final appliance spacing.
A current LG example shows why closed depth should not be confused with operating depth. The official WM4000HWA specification lists the washer at 30 1/4 inches deep but 55 inches deep with the door open.
For a simple planning example, imagine a pair with a 34-inch cabinet depth. If you temporarily use Maytag’s 6-inch rear planning allowance and 48-inch front working allowance, the wall-to-wall depth calculation becomes:
34 + 6 + 48 = 88 inches, or 7 feet 4 inches
An 8-foot room depth would leave another 8 inches beyond that example calculation. This helps explain why 5 x 8 feet can work as an early planning reference for a basic one-wall laundry room. It is still only an example. A shallower ventless dryer, deeper front loader, recessed connections, open room doorway or different manufacturer instructions can change the real result.
Plan Circulation and Door Movement Before Adding Storage
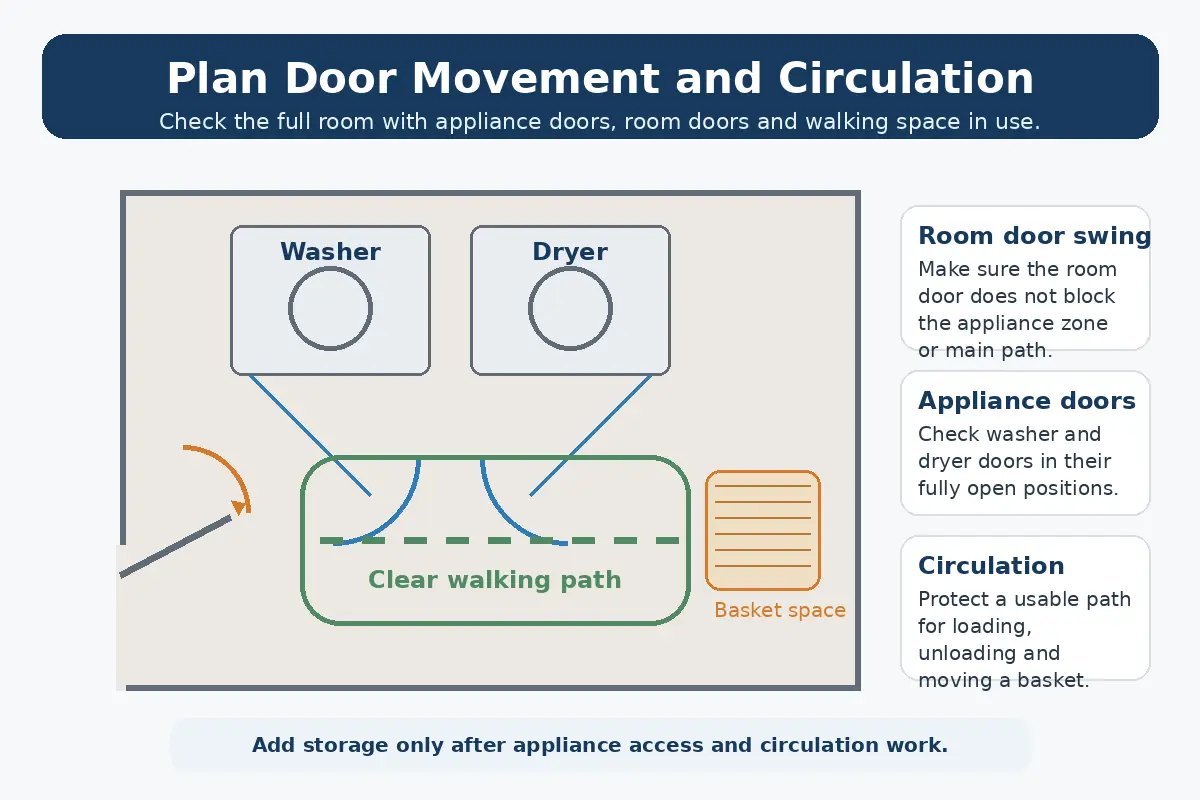
Good laundry room dimensions leave a usable path after every door and drawer is considered. Draw the room door, washer door, dryer door, top-load lid, cabinet doors and pull-out hampers in their open positions before filling the remaining wall space with storage.
The front work area has to support more than a door swing. A person may need to stand with a basket, bend in front of a front loader, transfer clothing between machines, or pass through the room while an appliance door is open.
This is especially important in a pass-through laundry room. A room can technically hold the appliances while still becoming frustrating if an open dryer door blocks the only walking path. If the laundry room serves as a route to a garage or mudroom, protect the circulation path before adding a deep counter or floor-standing cabinet.
Do not turn general planning allowances into accessibility or building-code claims. Projects with accessibility requirements, permits or local design standards should be checked against the requirements that actually apply to that project.
How to Calculate the Laundry Room Size You Need
When planning laundry room dimensions, start with the appliance layout and then add the installation, working, and circulation space the room needs.
Instead of starting with a label such as “standard” or “medium,” calculate the room from the layout you want.
Step 1: Choose the appliance configuration
Decide whether the room will use side-by-side machines, a compatible stacked pair, or an integrated tower or laundry center. This establishes the basic appliance wall width and height.
Step 2: Record exact appliance dimensions
Use the specification sheet for each model. Record width, height, closed depth and door-open or lid-open dimensions when provided.
Step 3: Add installation requirements
Read the installation instructions and account for the clearances and connection space that apply to the actual models. Do not automatically add a generic rear or side number when the manual gives a different requirement.
Step 4: Protect the front working area
Make sure doors can open and a person can load, unload and move a basket without being trapped against the opposite wall or cabinet. Manufacturer planning guides commonly use about 4 feet in front as a comfortable reference for loading and unloading, but the room should be tested against the actual door geometry and layout.
Step 5: Add storage and fixtures last
Only after the appliance and working zones are protected should you allocate space to a utility sink, counter, base cabinets, tall storage or hampers. This prevents an optional feature from consuming the floor area the appliances need to function.
Step 6: Check the complete room, not just the floor plan
Confirm ceiling height, overhead cabinets, top-load lid movement, stacked-unit height, lighting, valves, outlets, drain location, dryer vent route and the room-door swing. A layout can pass a width-and-depth check and still fail vertically or at the connections.
Common Laundry Room Dimension Mistakes
- Choosing a room from square footage alone. Room shape and appliance-wall length can matter more than the total area.
- Using appliance cabinet depth as room depth. Connections and the front work zone must also fit.
- Assuming 5 x 8 feet is a universal minimum. It is a useful planning example, not a requirement for every layout.
- Designing around a side-by-side pair without checking its exact width. Two machines labeled “full size” can still differ.
- Stacking only to save space. Height, approved compatibility, controls and front access still need to work.
- Letting storage invade the working zone. A deep cabinet or sink can turn an adequate room into a tight aisle.
- Ignoring open doors and lids. Closed appliance dimensions do not describe the full operating footprint.
- Confusing a laundry closet with a dedicated room. Closet sizing has different door, enclosure and ventilation concerns; see our washer and dryer closet dimensions guide when that is the actual installation.
The most reliable way to use laundry room dimensions is to start with the exact appliances, add their real installation space, protect a usable front work and circulation zone, and only then add storage or extra fixtures. A 5 x 8 foot room is a useful reference for many basic one-wall layouts, but the best room size is the one that works with the actual machines and the way the room will be used.