
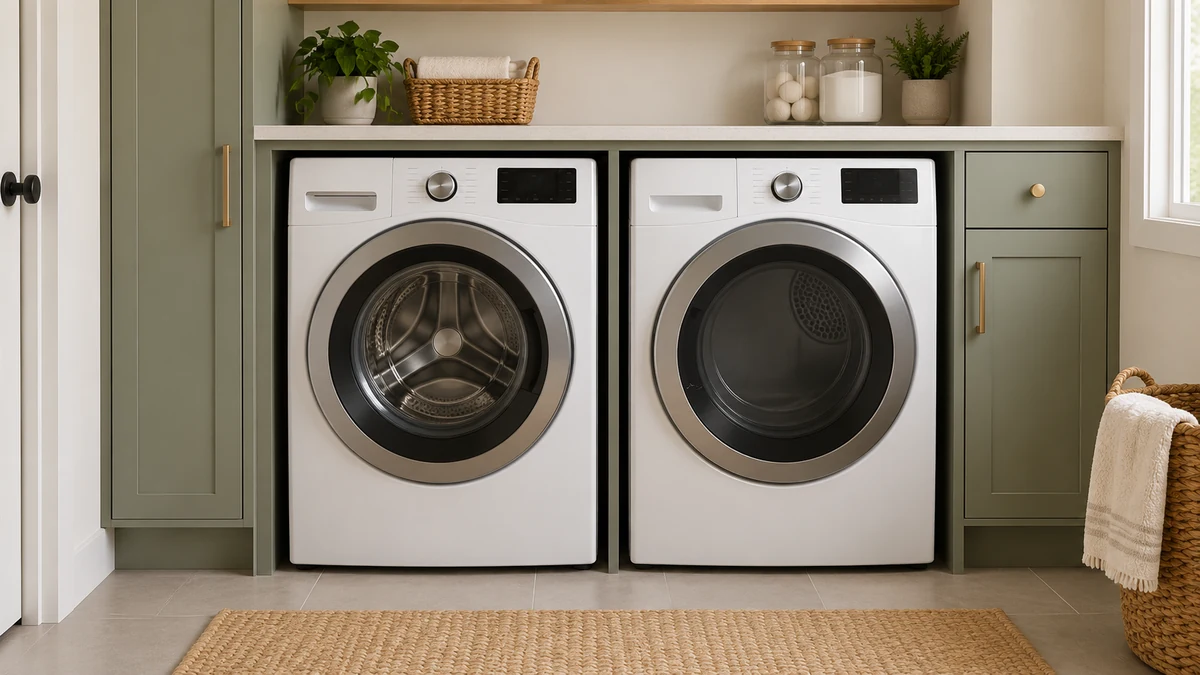
Washer dryer cabinet dimensions should be based on the exact side-by-side appliances you plan to install, not on one universal cabinet size. Many full-size front-load pairs are around 54 inches wide together, but the finished cabinet opening may need additional space at the sides, between the machines, above them, and behind them for connections and installation.
The safest approach is to select the washer and dryer first, then use the manufacturer’s cavity or installation dimensions when available. If the manufacturer does not publish a complete cabinet cutout, build the opening from the exact appliance dimensions plus the clearances required for that model.
Quick Washer Dryer Cabinet Dimensions Guide
| Cabinet measurement | What determines it | What to check |
|---|---|---|
| Opening width | Washer width + dryer width + required side and center gaps | Exact appliance widths and manufacturer clearance instructions |
| Opening height | Taller appliance + required top clearance | Control panel height, leveling feet, countertop or cabinet above |
| Cavity depth | Manufacturer cavity specification or installation layout | Cabinet depth, hoses, drain, power, gas, dryer vent and connection layout |
| Front opening | Cabinet face frame, trim and side panels | Actual clear opening after finished cabinetry is installed |
| Service access | Connection and appliance-removal requirements | Shutoff valves, outlets, drain, vent connection and pull-out path |
A broad planning number can help during early design, but it should not be used as the final cabinet construction dimension. Whirlpool and Maytag describe many standard side-by-side sets as about 54 inches wide and recommend roughly 56 inches of available width as general planning guidance. Exact models can differ.
How Wide Should a Washer Dryer Cabinet Be?
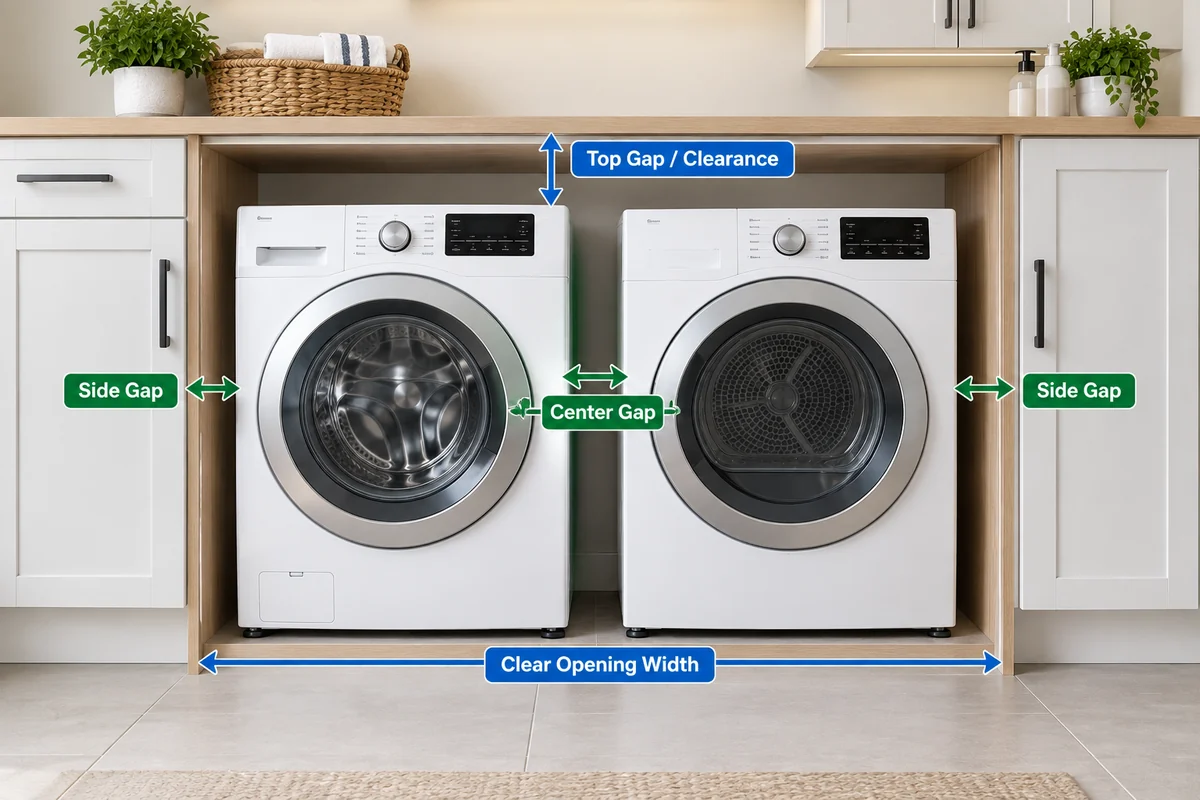
The cabinet opening must be wider than the combined physical width of the washer and dryer whenever the manufacturer requires gaps beside or between the appliances.
For example, two 27-inch appliances have a combined cabinet width of about 54 inches. That does not automatically mean a 54-inch finished cabinet opening will work. The machines may need space between them and additional clearance beside the cabinet panels.
Whirlpool’s laundry sizing guidance describes a standard side-by-side pair as about 54 inches wide and recommends about 56 inches of available width for many installations. Its general planning guidance also calls for space between side-by-side appliances. Use these numbers for early planning only; the exact model documentation should control final construction.
Maytag’s washer and dryer sizing guide gives similar broad guidance for many side-by-side pairs.
If you need a detailed comparison of appliance widths rather than cabinet construction, use our side-by-side washer and dryer dimensions guide. This article stays focused on turning those appliance measurements into a usable cabinet opening.
A simple width formula
When the manufacturer does not publish a complete cavity width, a useful planning framework is:
Cabinet clear opening width = washer width + dryer width + required left gap + center gap + required right gap
The important phrase is clear opening width. Measure the usable space between the finished cabinet surfaces, not the outside width of the cabinet box.
Do not insert generic 1-inch gaps into every design automatically. Some manufacturers specify different clearances for particular products and installation types.
How Tall Should the Cabinet Opening Be?
Height is another important part of washer dryer cabinet dimensions, especially when front-load machines sit beneath a countertop, shelf, or built-in upper structure.
Start with the taller of the two appliances. Then account for the model-required top clearance and any height adjustment available through the leveling feet.
A cabinetmaker should not build the countertop directly from a nominal appliance height without checking the installation drawing. Product height can vary by model, and the required cavity height may be larger than the appliance itself.
One current Fisher & Paykel side-by-side planning guide lists an overall product height of 1025 mm and a cavity height of 1042 mm for the covered configuration. The same guide also specifies top-gap requirements.
This example shows why appliance height and cabinet cavity height are not always the same number.
Top-load machines need a different approach
A top-load washer also needs vertical space for its lid to open. For that reason, a low fixed countertop directly above a top-load washer may not be practical even when the closed appliance fits beneath it.
This article focuses mainly on built-in side-by-side cabinetry. Always verify the full lid-open height before placing shelves or cabinets above a top-load machine.
How Deep Should a Washer Dryer Cabinet Be?
Cabinet depth is one of the easiest parts of washer dryer cabinet dimensions to oversimplify.
The appliance’s published product depth is only one part of the installation. Water hoses, the washer drain, electrical connections, a gas connection when applicable, and dryer exhaust components can affect the final wall-to-front position.
However, you should not simply add one generic rear-clearance number to every product. Some manufacturers publish a specific cavity depth, and their measurement method may not match a simple “appliance depth plus rear gap” formula.
For example, the Fisher & Paykel planning guide lists an overall product depth of 695 mm and an overall cavity depth of 688 mm for one covered configuration. Read the full manufacturer’s drawing rather than converting those numbers into a homemade universal formula.
A separate Fisher & Paykel side-by-side installation guide lists different cavity depths depending on how the covered appliances are installed within cabinetry. This further shows why the exact configuration matters.
So the correct question is not simply, “How deep is the washer?” Instead, ask what cavity depth and connection arrangement the manufacturer requires for the exact installation.
For a deeper explanation of rear hoses, drains, dryer ducts and wall spacing, see our washer dryer clearance from wall guide.
Manufacturer Cabinet and Cavity Examples
Real manufacturer drawings show why there is no universal washer dryer cabinet size.
| Example | Product or pair size | Published cavity requirement | Planning lesson |
|---|---|---|---|
| Fisher & Paykel current side-by-side configuration | 1214 mm overall pair width | 1236 mm cavity width | Cavity width exceeds product width and includes specified gaps. |
| Fisher & Paykel current configuration | 1025 mm product height | 1042 mm cavity height | Cabinet height should follow the cavity drawing, not appliance height alone. |
| Fisher & Paykel earlier side-by-side guide | Model-specific washer and dryer pairing | 1260 mm minimum width and 650 or 705 mm depth depending on installation type | The same product family can require different cavity depths depending on how cabinetry surrounds it. |
| Samsung custom cabinet example | Model-specific installation | Clearances vary by position in the illustrated layout | Use the exact model’s installation drawing rather than a universal gap. |
The current Fisher & Paykel planning guide lists a 1214 mm overall product width and a 1236 mm cavity width for the covered side-by-side configuration. It also provides separate cavity height, cavity depth, and gap information.
A separate Fisher & Paykel guide lists different cavity dimensions for another set of models and installation arrangements.
Samsung installation documentation also uses model-specific custom-cabinet and side-by-side clearance diagrams rather than one universal cabinet opening.
These are examples, not universal dimensions. Their main value is showing why the final cabinet opening should come from the exact manufacturer’s drawing.
Plan for Hookups and Service Access
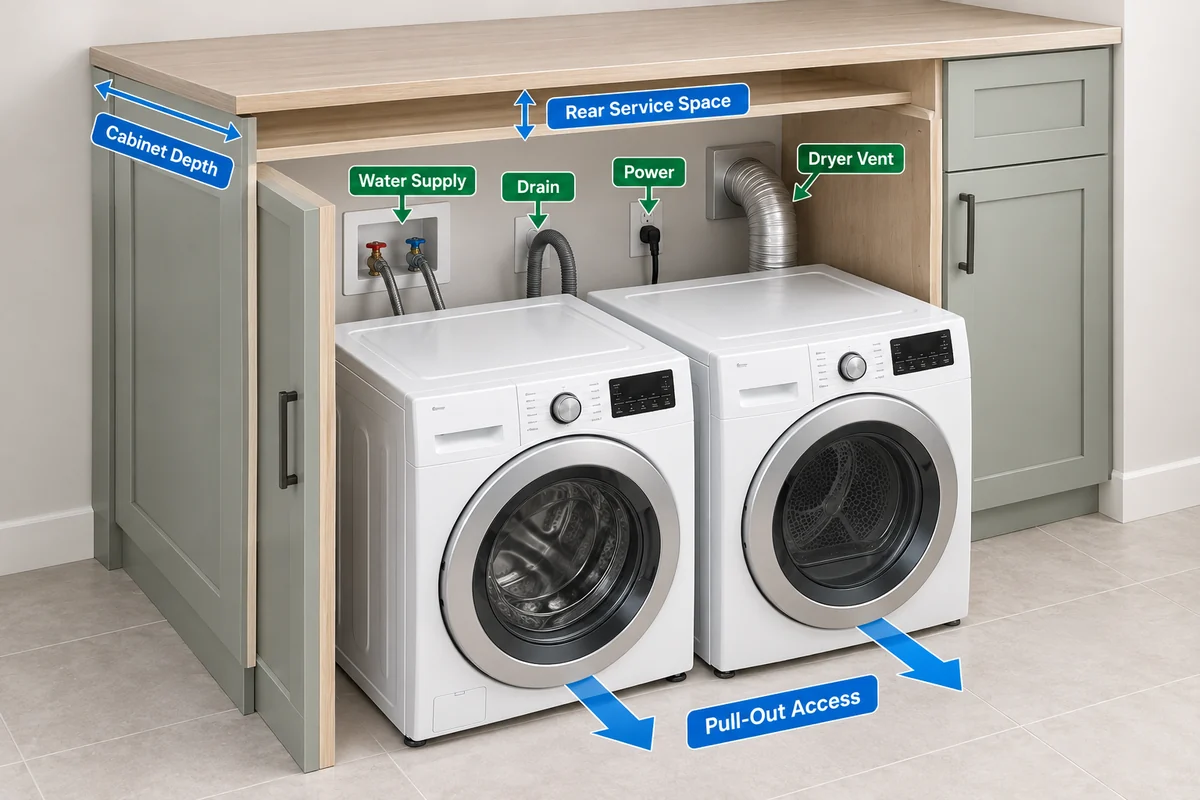
A cabinet can be large enough for the appliances and still be poorly designed for installation or maintenance.
Before the cabinet is built, locate:
- hot and cold water shutoff valves;
- the washer drain connection;
- electrical receptacles;
- the gas shutoff when a gas dryer is used;
- the dryer exhaust connection when applicable;
- and any junction, drain, or service point required by the selected models.
These connections need to remain usable after the appliances are installed. Manufacturer installation instructions should be checked for accessibility and service requirements.
In some cabinetry layouts, placing utilities in an adjacent cabinet can make connections easier to reach. Whether that arrangement is acceptable depends on the appliance instructions and applicable plumbing, electrical, gas, and building requirements.
Make sure the machines can come back out
Service access is not only about reaching a plug or valve. The washer and dryer may eventually need to be pulled forward for repair, replacement, cleaning, or connection work.
A cabinet design should therefore avoid permanently trapping the machines behind:
- fixed face-frame lips;
- floor trim;
- countertop supports;
- door hardware;
- decorative side panels;
- or cabinetry that narrows the appliance-removal path.
If the opening is large enough for the appliance cabinet but not for the appliance to be maneuvered in and out, the design is too tight.
Do Not Let Cabinet Trim Reduce the Clear Opening
One easy mistake is to design the cabinet box at the correct width but forget that the finished opening may be smaller.
For example, face-frame rails, applied trim, filler strips, hinges, door stops, or decorative panels can project into the cavity. The measurement that matters is the narrowest finished opening through which the appliance must pass.
Measure the cabinet at several points:
- floor level;
- mid-height;
- near the control-panel height;
- and beneath the countertop or upper rail.
Also check baseboards and finished flooring. A cabinet may measure correctly above the floor while trim or flooring transitions reduce the usable width lower down.
Countertop supports need attention too
For an under-counter front-load pair, brackets or vertical supports should not occupy the clearance the appliances need. Confirm the support layout before fabrication, especially when the countertop spans both machines.
The countertop itself should also be designed around the manufacturer’s installation requirements rather than resting directly on the appliances unless that arrangement is specifically permitted.
How to Calculate Your Exact Washer Dryer Cabinet Cutout
Use this sequence when turning washer dryer cabinet dimensions into a finished cutout for your exact appliances.
- Select the exact washer and dryer. Do not design the final cabinet around generic 27-inch appliance dimensions if the models have not been chosen.
- Download both manufacturer installation documents. Look for cavity, alcove, custom cabinet, side-by-side, under-counter, or minimum-clearance drawings.
- Record the actual appliance width, height and depth. Use the exact models, including any pedestal or accessory that will remain installed.
- Use the manufacturer’s cavity dimensions when provided. Do not replace an official cavity drawing with a generic formula.
- Calculate the clear opening if no complete cavity width is given. Add appliance widths and the specific side and center clearances required for the installation.
- Check the top opening. Include leveling adjustment and any required space below a countertop or upper cabinet structure.
- Map the rear services. Confirm water, drain, power, gas and dryer exhaust locations before deciding the final cavity depth.
- Measure the finished opening. Account for face frames, trim, filler panels, brackets and baseboards.
- Confirm installation and removal access. Make sure both appliances can be connected, leveled, serviced and pulled out again.
If the appliance pair is going inside an actual enclosed closet with doors rather than open cabinetry, use our washer and dryer closet dimensions guide. Closet-door clearance and ventilation introduce additional requirements outside the main scope of this cabinet guide.
Washer Dryer Cabinet Dimensions: Final Fit Check
- Choose the exact washer and dryer before final cabinet fabrication.
- Use model-specific cavity dimensions whenever the manufacturer provides them.
- Do not assume two 27-inch machines fit a 54-inch finished opening.
- Measure the clear finished opening, not only the outside cabinet width.
- Include required gaps beside and between the appliances.
- Check the taller appliance before setting countertop height.
- Do not calculate cavity depth from appliance depth alone.
- Plan water, drain, electrical, gas and dryer exhaust connections before construction.
- Keep required service points accessible.
- Make sure trim and face frames do not trap the appliances.
- Confirm the machines can be removed for future service or replacement.
The best washer dryer cabinet dimensions are therefore the dimensions required by your exact side-by-side pair, not a universal 56-inch or 60-inch cabinet. Generic dimensions can help during early planning, but the final cavity should follow the selected appliances, manufacturer clearances, utility layout, finished cabinet opening, and service-access needs.