
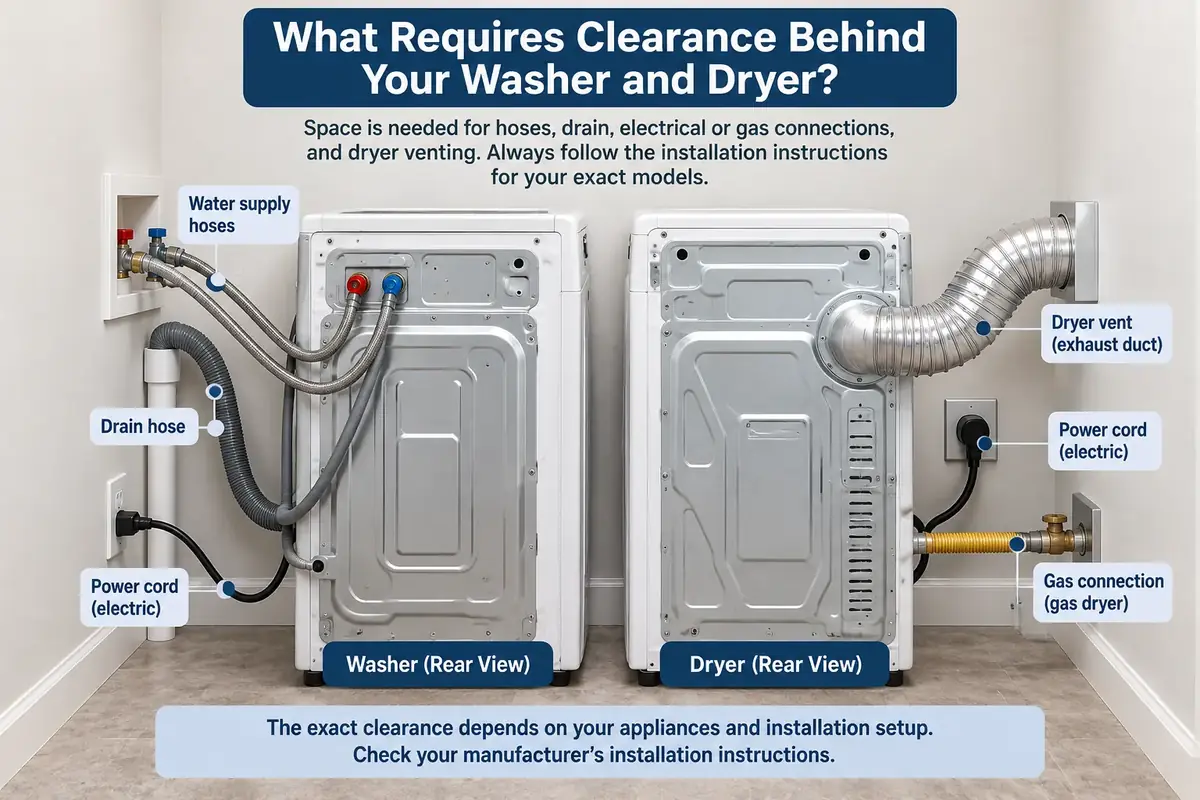
Washer dryer clearance from wall is not a universal number. For early planning, about 6 inches behind the appliances is a useful starting allowance for hoses, connections and ventilation, but the exact space can be smaller or larger depending on the washer, dryer, and hookup arrangement. Always use the installation instructions for your exact models before finalizing the wall position.
For example, Whirlpool’s laundry sizing guide recommends allowing at least 6 inches behind the appliances for hoses and ventilation. In contrast, LG specifies 4 inches behind its WM4200 front-load washer for water inlet hoses, the drain hose and airflow. LG’s current dryer installation guidance also shows 4 inches behind an electric or heat-pump dryer and 5 inches behind a gas dryer in the installation examples it covers.
| Planning situation | Rear space shown in source | What the space accommodates |
|---|---|---|
| General Whirlpool planning guidance | At least 6 inches | Hoses and ventilation |
| LG WM4200 washer example | 4 inches minimum | Water inlet hoses, drain hose and airflow |
| LG electric or heat-pump dryer guidance | 4 inches minimum | Rear installation space for the dryer |
| LG gas dryer guidance | 5 inches minimum | Includes space for installation of the rear exhaust duct |
These numbers are examples, not a replacement for the manual supplied with your appliance. The important lesson is that appliance cabinet depth and installed depth are not always the same measurement.
How Much Washer Dryer Clearance From Wall Is Needed?
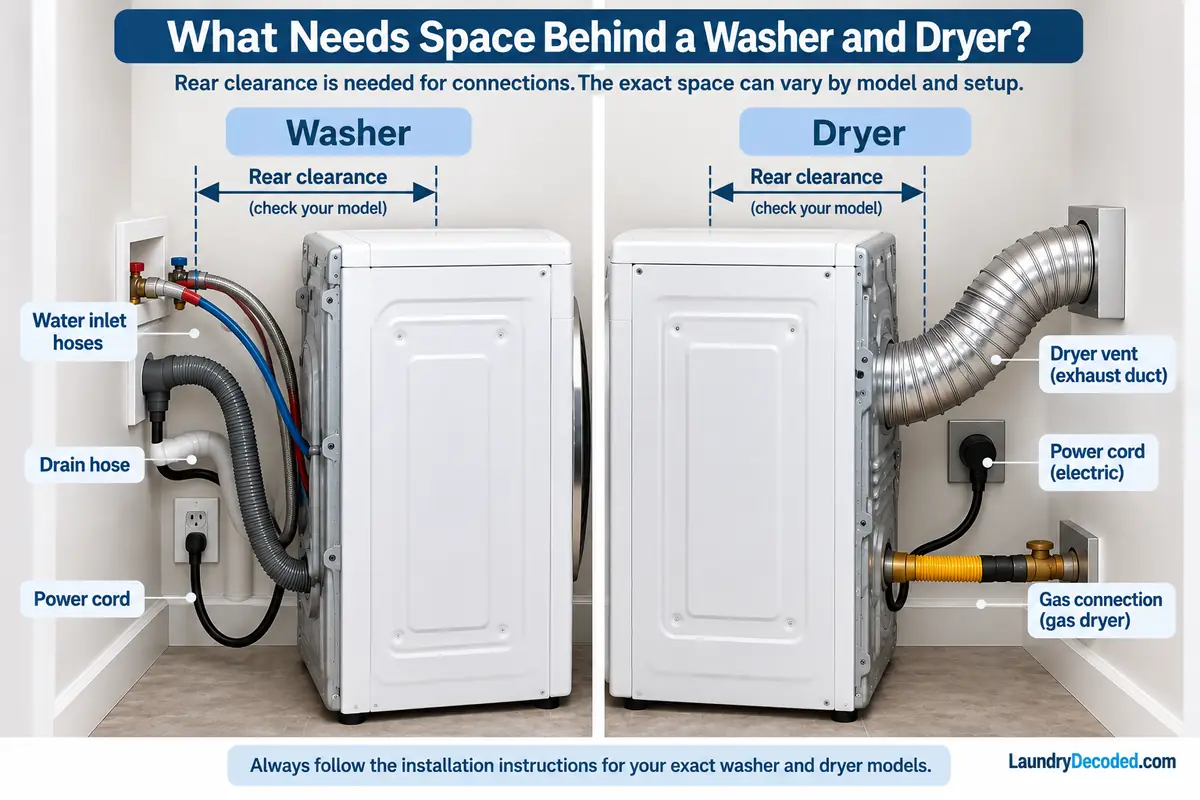
About 6 inches is a sensible general planning allowance when you do not yet know the exact models. It gives you room to begin planning for washer hoses, drainage, electrical connections and dryer venting. It should not be treated as a universal installation minimum.
Actual manufacturer requirements can differ. LG’s official WM4200 builder specification sheet, for example, calls for at least 4 inches behind the washer. LG states that this space provides clearance for the water inlet hoses, drain hose and airflow.
The correct number for your installation is therefore the space required by the exact appliance instructions plus enough physical room for the connections to sit in their intended positions without being crushed, sharply bent, or forced against the wall.
If you are still comparing complete appliance sizes rather than only the rear gap, start with our washer and dryer dimensions guide.
Washer Dryer Clearance From Wall: Washer Connections
A washer does not simply stop at the back edge of its metal cabinet. Several connections usually occupy space between the appliance and the wall.
Water inlet hoses
Hot and cold water hoses connect to fittings on the back of many washers. The fittings, hose ends and hose routing all need space. If the hoses are forced into an extremely tight bend immediately behind the washer, the machine may physically fit in the opening while the connections do not.
This is one reason model-specific installation drawings matter. The LG WM4200 example specifies 4 inches behind the washer specifically for its water inlet hoses, drain hose and airflow rather than presenting that 4-inch dimension as an arbitrary decorative gap.
Drain hose
The washer drain hose also needs a usable route from the appliance to the standpipe, outlet box or other approved drain arrangement. It should not be pinched between the cabinet and wall.
The position of the drain connection can make two apparently identical laundry spaces behave differently. A recessed outlet box may keep much of the plumbing within the wall plane, while surface-mounted valves or plumbing can project toward the washer and consume part of the available gap.
Power connection
The electrical cord and plug also need to reach their intended outlet without being trapped behind the machine. Check the exact installation instructions for outlet-location requirements rather than assuming every washer uses the same connection position.
The result is simple: measure to the connection that projects farthest into the appliance space, not just to the painted drywall behind it.
Washer Dryer Clearance From Wall: Dryer Connections
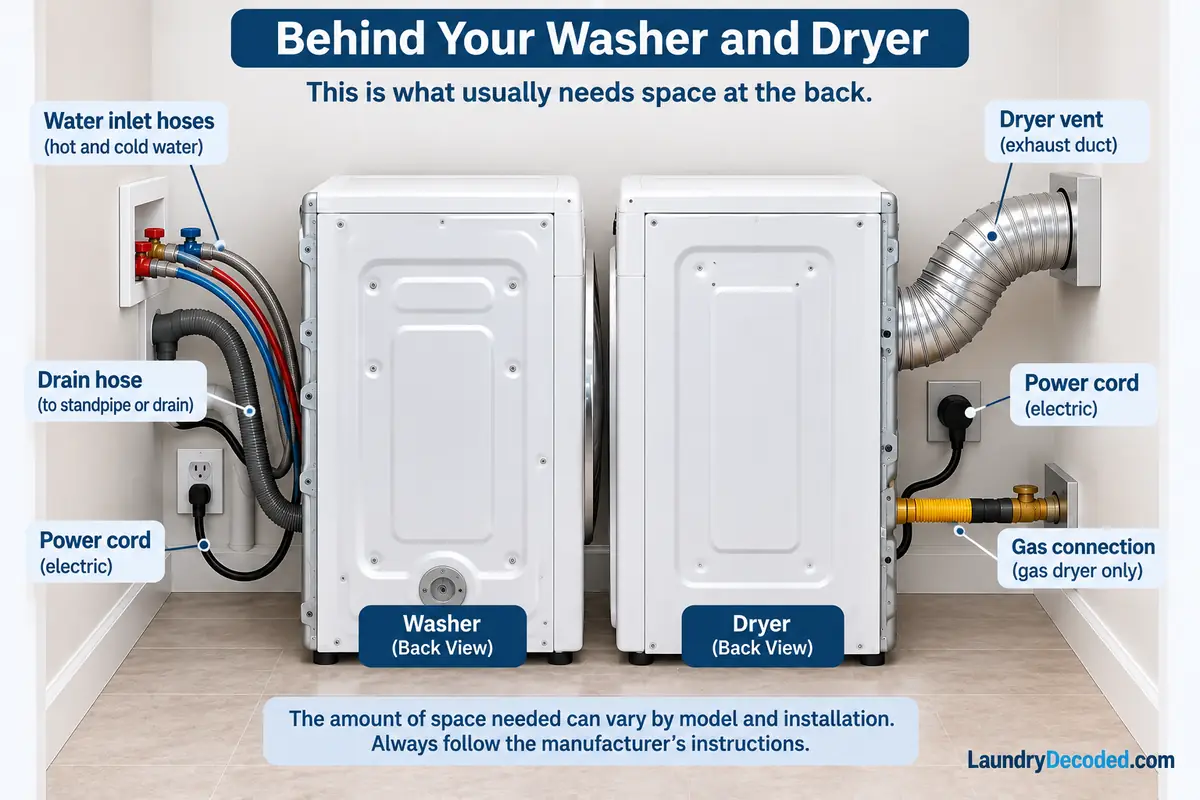
Dryers can be more sensitive to rear-space planning because a vented dryer may need an exhaust connection in addition to its electrical or gas connection.
Exhaust duct on a vented dryer
The transition between the dryer outlet and the home’s exhaust duct can determine how far the dryer projects from the wall. A rear exhaust elbow or transition duct occupies real depth behind the cabinet.
LG’s current dryer pre-purchase and installation checklist specifies 5 inches between the back of the unit and the wall for the gas-dryer example so there is room for installation of the rear exhaust duct. The same guide says to use rigid or semi-rigid metal ducting and keep the duct route as short and straight as possible.
That is why pushing a vented dryer closer to the wall is not simply a matter of applying more force. The connection configuration has to work at the reduced depth.
Electrical and gas connections
An electric dryer needs its required electrical connection. A gas dryer also has a gas supply connection that must be installed as specified for the appliance and local installation conditions.
Do not estimate rear clearance from the dryer cabinet alone. Look at the complete installation drawing and the actual location of the exhaust, electrical connection and gas supply when applicable.
How Dryer Type Changes Rear Space
The rear clearance needed by a dryer can change with the drying system and installation configuration.
Conventional vented dryer
A conventional vented dryer normally has an exhaust connection behind or near the rear of the appliance. The exhaust arrangement may therefore become the largest rear-space requirement.
This article does not calculate dryer duct diameter or maximum duct length because those are separate installation questions. Here, the important point is simply that the transition from the dryer to the wall can increase installed depth.
Heat-pump or other ventless dryer
A ventless or heat-pump dryer does not use the same conventional exterior exhaust duct as a standard vented dryer. That can remove one major source of rear projection, but it does not mean the appliance can automatically sit against the wall.
LG’s 2026 dryer checklist, for example, specifies 4 inches behind the electric or heat-pump dryer covered by its guidance. Power, drainage on models that require it, airflow and manufacturer-specified spacing still have to be considered.
Gas dryer
A gas dryer adds a gas connection to the items that must be checked behind the machine. Its exhaust system still matters as well. In LG’s current checklist, the gas-dryer example uses a 5-inch rear clearance specifically to allow installation of the rear exhaust duct.
That does not mean every gas dryer universally requires 5 inches. It means the exact installation arrangement matters, which is why model documentation has priority over a generic clearance chart.
Washer Dryer Clearance From Wall vs. Installed Depth
One of the easiest mistakes is to treat the appliance’s published cabinet depth as the amount of room it will occupy after installation.
Suppose a washer cabinet is 33 1/4 inches deep and its instructions call for 4 inches behind the appliance. A first-pass planning depth would be:
33 1/4 inches + 4 inches = 37 1/4 inches
That calculation happens to match the cutout depth shown in LG’s WM4200 builder documentation, but it should not be copied to a different washer unless that washer’s own instructions support the same arrangement.
For general planning, use this method:
Approximate installed depth = appliance depth + applicable rear installation space
Then verify that the connections actually fit within that space. A fitting, valve, vent elbow, baseboard or surface-mounted outlet that projects farther forward may increase the real installed depth.
This distinction is especially important in tight installations. Our washer and dryer closet dimensions guide explains how rear connections combine with the rest of the closet depth, while this page stays focused on the rear gap itself.
How to Measure Washer Dryer Clearance From Wall
To measure washer dryer clearance from wall correctly, start with the installation instructions for your exact washer and dryer models, then check how far the hoses, drain, power connection, gas fitting and dryer duct project from the wall.
Do not begin by measuring an arbitrary 4-inch or 6-inch line from the wall. Start with the exact appliances and connections.
- Find both model numbers. Use the specification sheet and installation instructions for the washer and dryer you actually plan to install.
- Record the cabinet depth. Check how the manufacturer defines depth. Do not accidentally substitute door-open depth for closed appliance depth.
- Find the stated rear clearance. Look for the floor, alcove, closet or installation-clearance drawing that applies to your configuration.
- Map every rear connection. Locate the washer valves, drain, electrical outlets, gas connection when applicable and dryer exhaust.
- Measure protrusions from the wall. Include outlet boxes, valves, vent collars, baseboards and other items that extend forward.
- Check the hose and duct paths. Confirm that nothing is sharply folded, crushed or forced into a space smaller than the installation arrangement allows.
- Calculate installed depth. Add the applicable rear space to the appliance depth, then compare the result with the available room or closet depth.
- Verify both machines separately. The washer and dryer can have different depths and different rear requirements even when they are sold as a matching pair.
If the pair will sit side by side, our side-by-side washer and dryer dimensions guide covers the width calculation separately. Do not use side gaps as a substitute for the rear clearance calculation.
Example rear-depth calculation
Imagine a washer that is 32 inches deep and whose installation instructions require 4 inches behind it.
32 + 4 = 36 inches approximate installed depth
If the water valves project farther into the room than the arrangement shown in the manufacturer’s installation diagram, you may need more than 36 inches. The formula is a planning check, not permission to ignore the hookups.
Can Recessed Hookups Reduce How Far the Machines Project?
Sometimes. A recessed washer outlet box or appropriately designed dryer connection can move part of the hookup into the wall cavity instead of leaving it fully behind the appliance. That can reduce wasted depth in some installations.
But a recessed connection does not cancel the manufacturer’s clearance requirements. It also does not make every dryer suitable for near-wall installation. The vent direction, transition fitting, plumbing position, electrical connection, and service access still have to match the appliance instructions.
If you are designing the entire room rather than only solving the rear gap, use our laundry room dimensions guide to check appliance depth together with circulation and usable floor space.
Final Washer Dryer Clearance From Wall Check
- Confirm the exact washer and dryer model numbers.
- Read both installation manuals rather than relying only on a retailer dimension table.
- Record the required or recommended rear spacing for each appliance.
- Check the physical projection of water valves, drain connections, outlets, and gas fittings.
- Confirm that washer hoses and the drain hose have a usable route.
- Confirm that a vented dryer’s exhaust transition fits without being forced into an unsuitable shape.
- Use the larger real-world installed depth when the washer and dryer differ.
- Include baseboards, trim or wall projections that reduce usable depth.
- Recheck the finished installation before assuming the appliances can move closer to the wall.
The best answer to washer dryer clearance from wall is therefore not one magic measurement. About 6 inches is a practical early planning allowance, but documented appliances can call for 4 inches, 5 inches, or another model-specific value. Finalize the installation based on the exact manuals and the real connections behind the machines, not on cabinet depth alone.